3 Roatan Sites You Should Dive on Nitrox
Enriched air contains a higher oxygen content and lower nitrogen content air does, giving a diver the ability to extend their no-decompression limit (or dive time). For a few of our dive sites, given their topography and depth, we find it more enjoyable to dive on enriched air Nitrox (EANx32).
One of the many perks of diving on Roatan is the high volume of dive sites available in close proximity to land, with calm conditions and reefs starting shallow so that that we can easily dive on air.
Despite that fact that most of our dive sites are conducive to diving on air, we have a lot of Nitrox certified divers who like to dive on enriched air because of its many benefits. While it all comes down to personal preference, there are a few dive sites here on Roatan that we highly recommend diving on Nitrox in order to enjoy longer bottom times.

Enriched air contains a higher oxygen content and lower nitrogen content air does, giving a diver the ability to extend their no-decompression limit (or dive time). For a few of our dive sites, given their topography and depth, we find it more enjoyable to dive on enriched air Nitrox (EANx32). Having your Enriched Air Diver certification and diving on Nitrox will allow you to explore these sites to their fullest and to ensure a conservative profile.
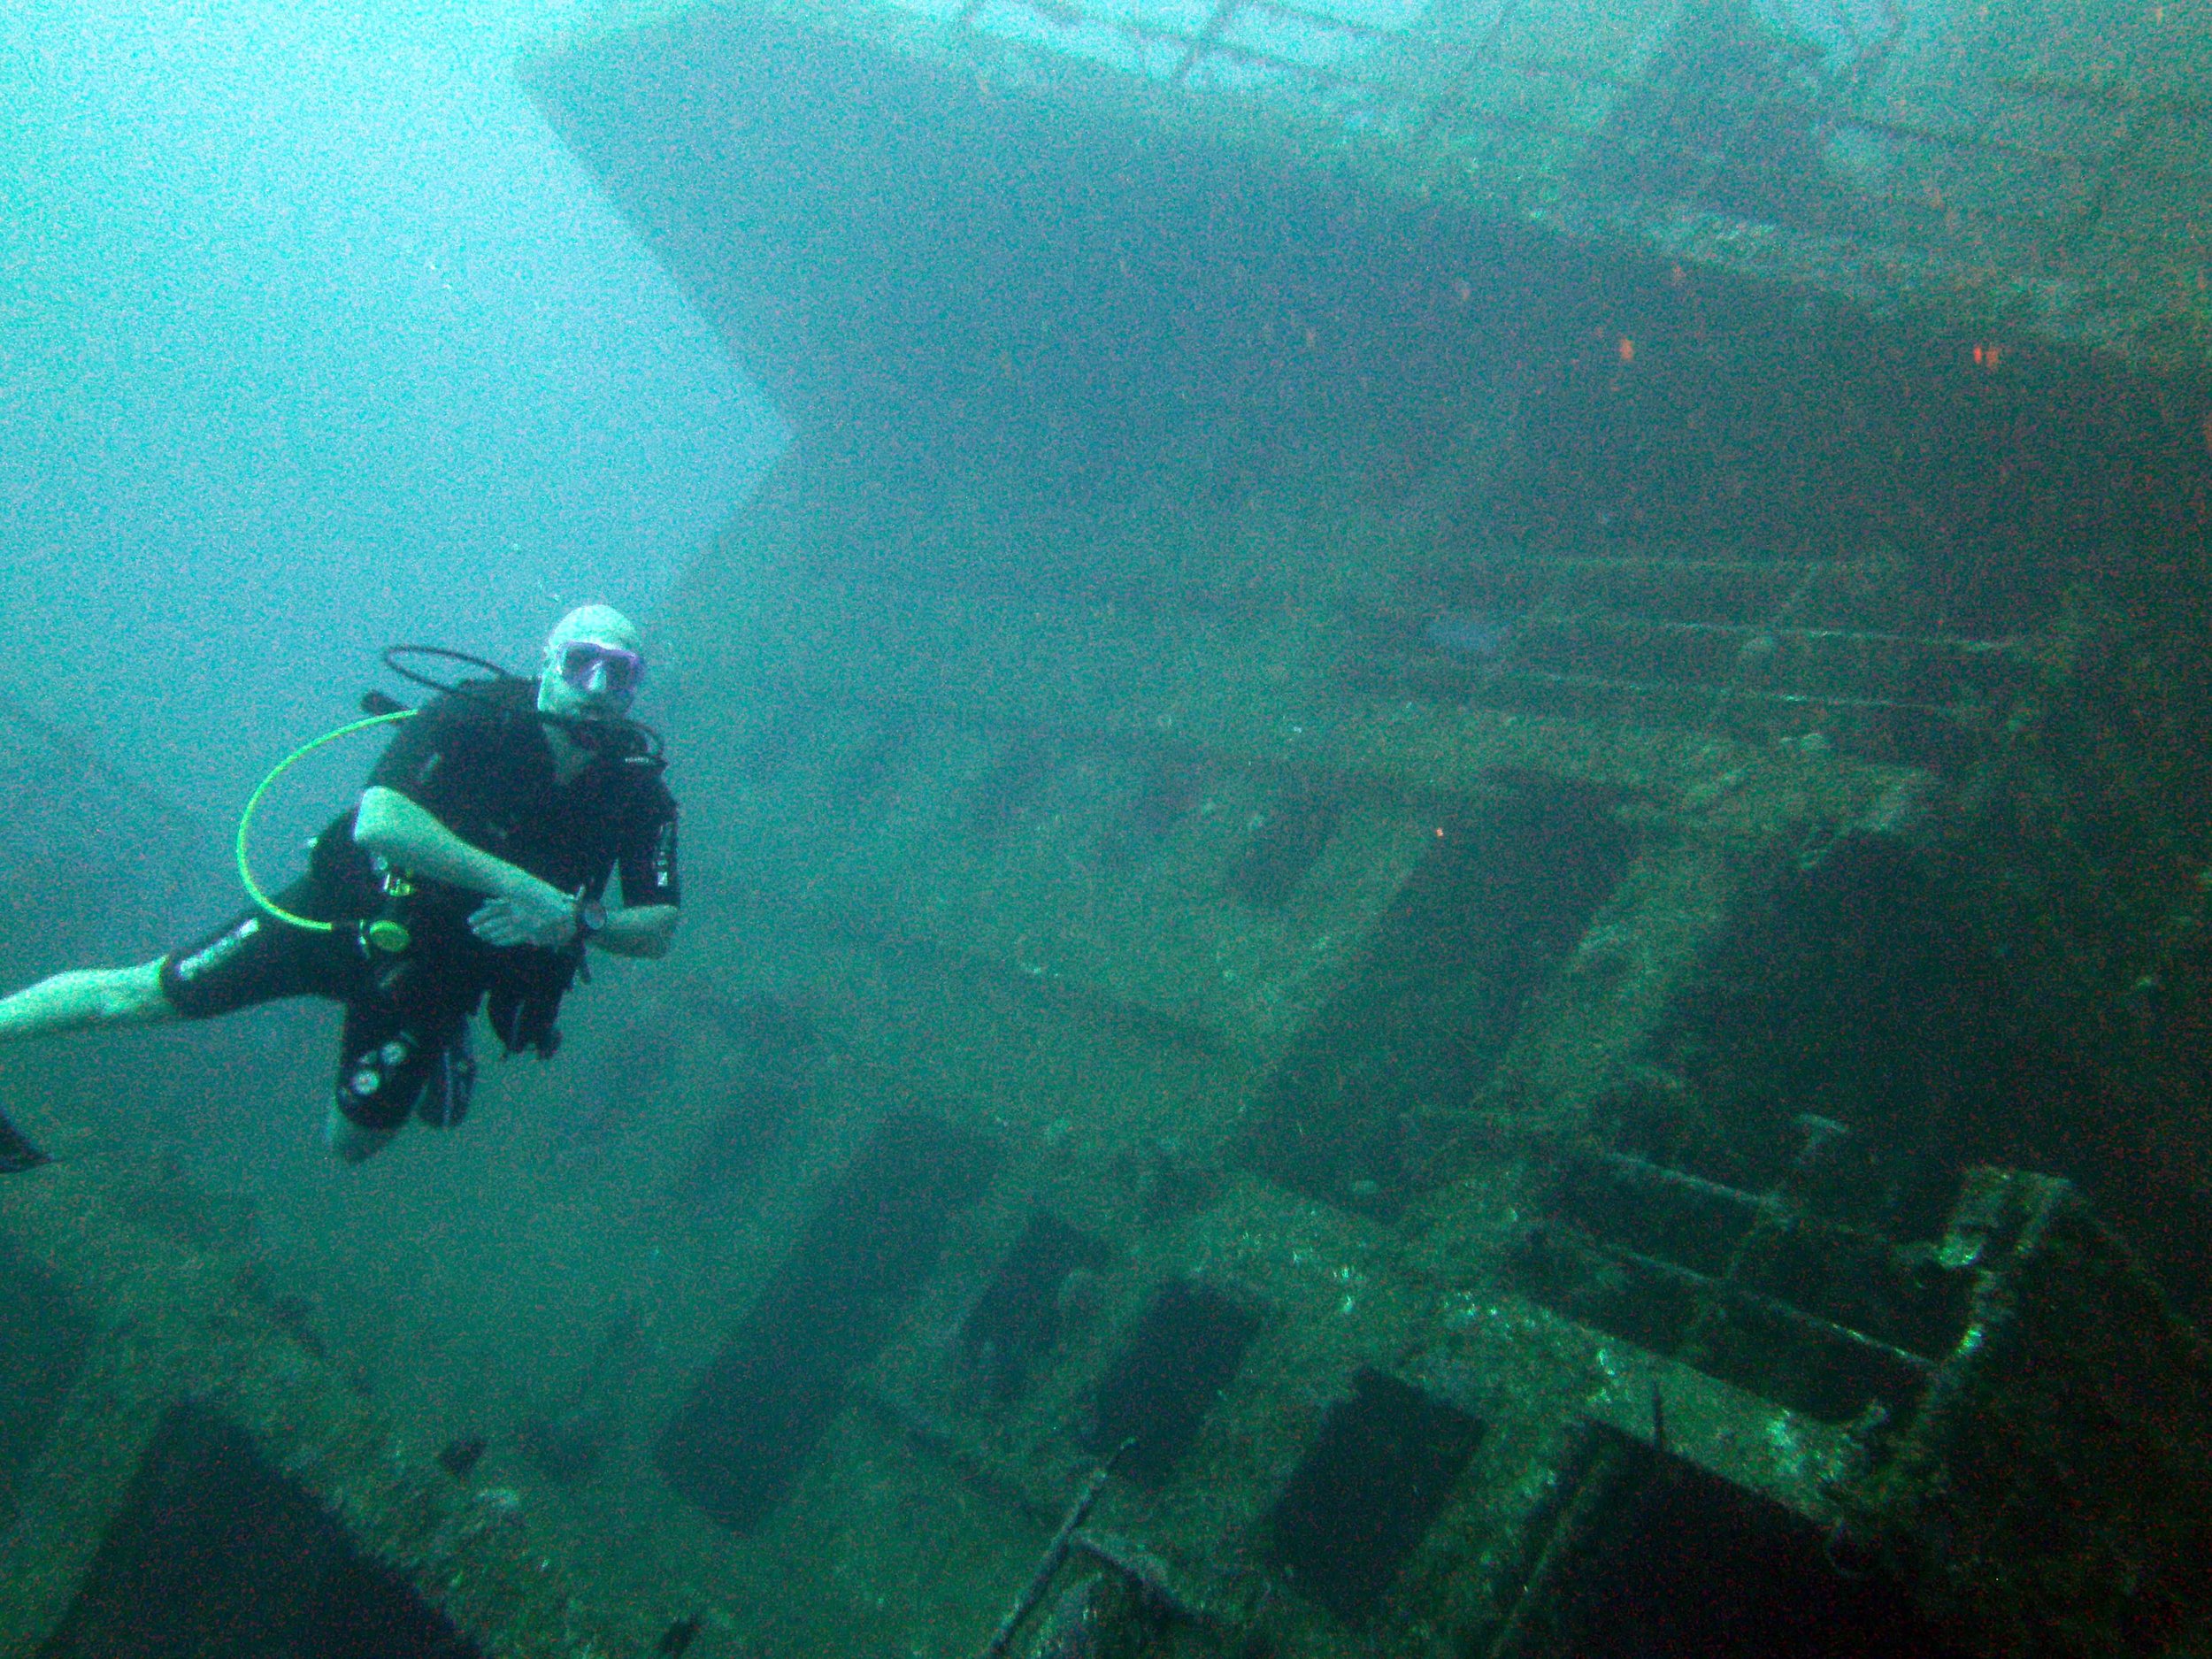
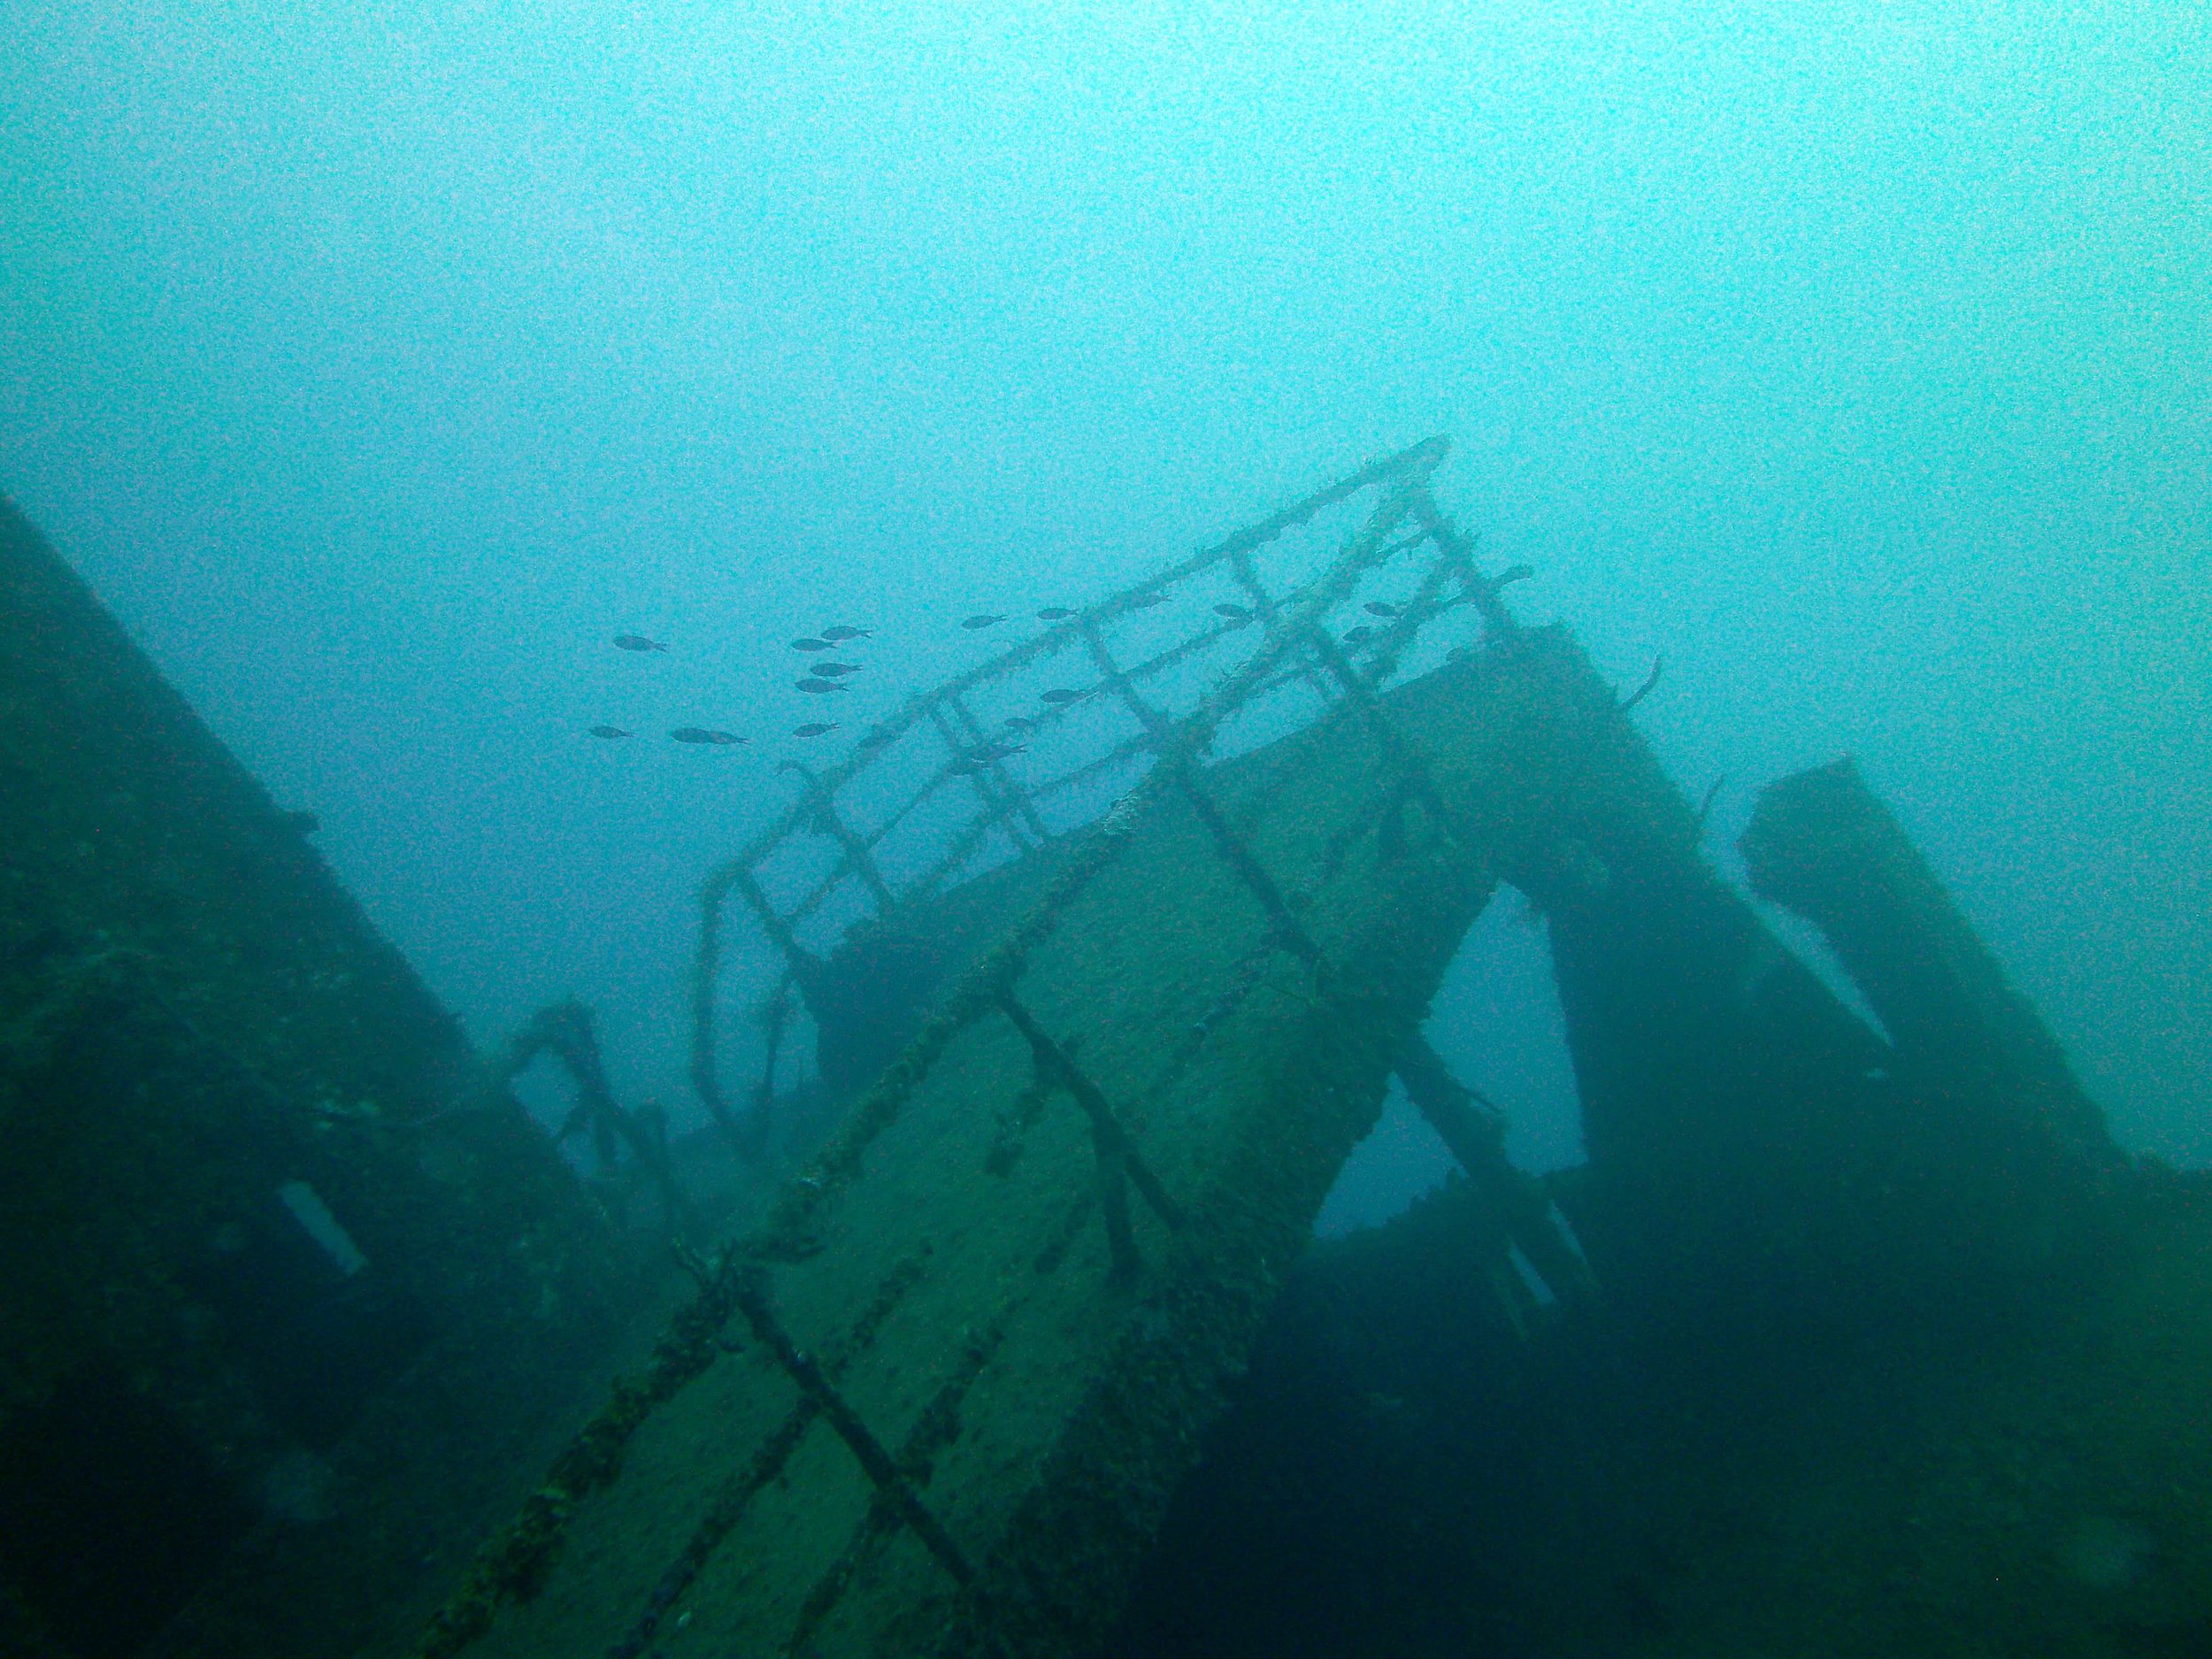
1. The Odyssey Shipwreck
This cargo ship measures 300ft/100m in length, is about a 20 minute boat ride from West End. Sunk in 2002, the wreck sits on the sand at 110 ft/30.5m, and diving on Nitrox allows you to explore the length and structure of this ship with ample no-decompression time to spare.
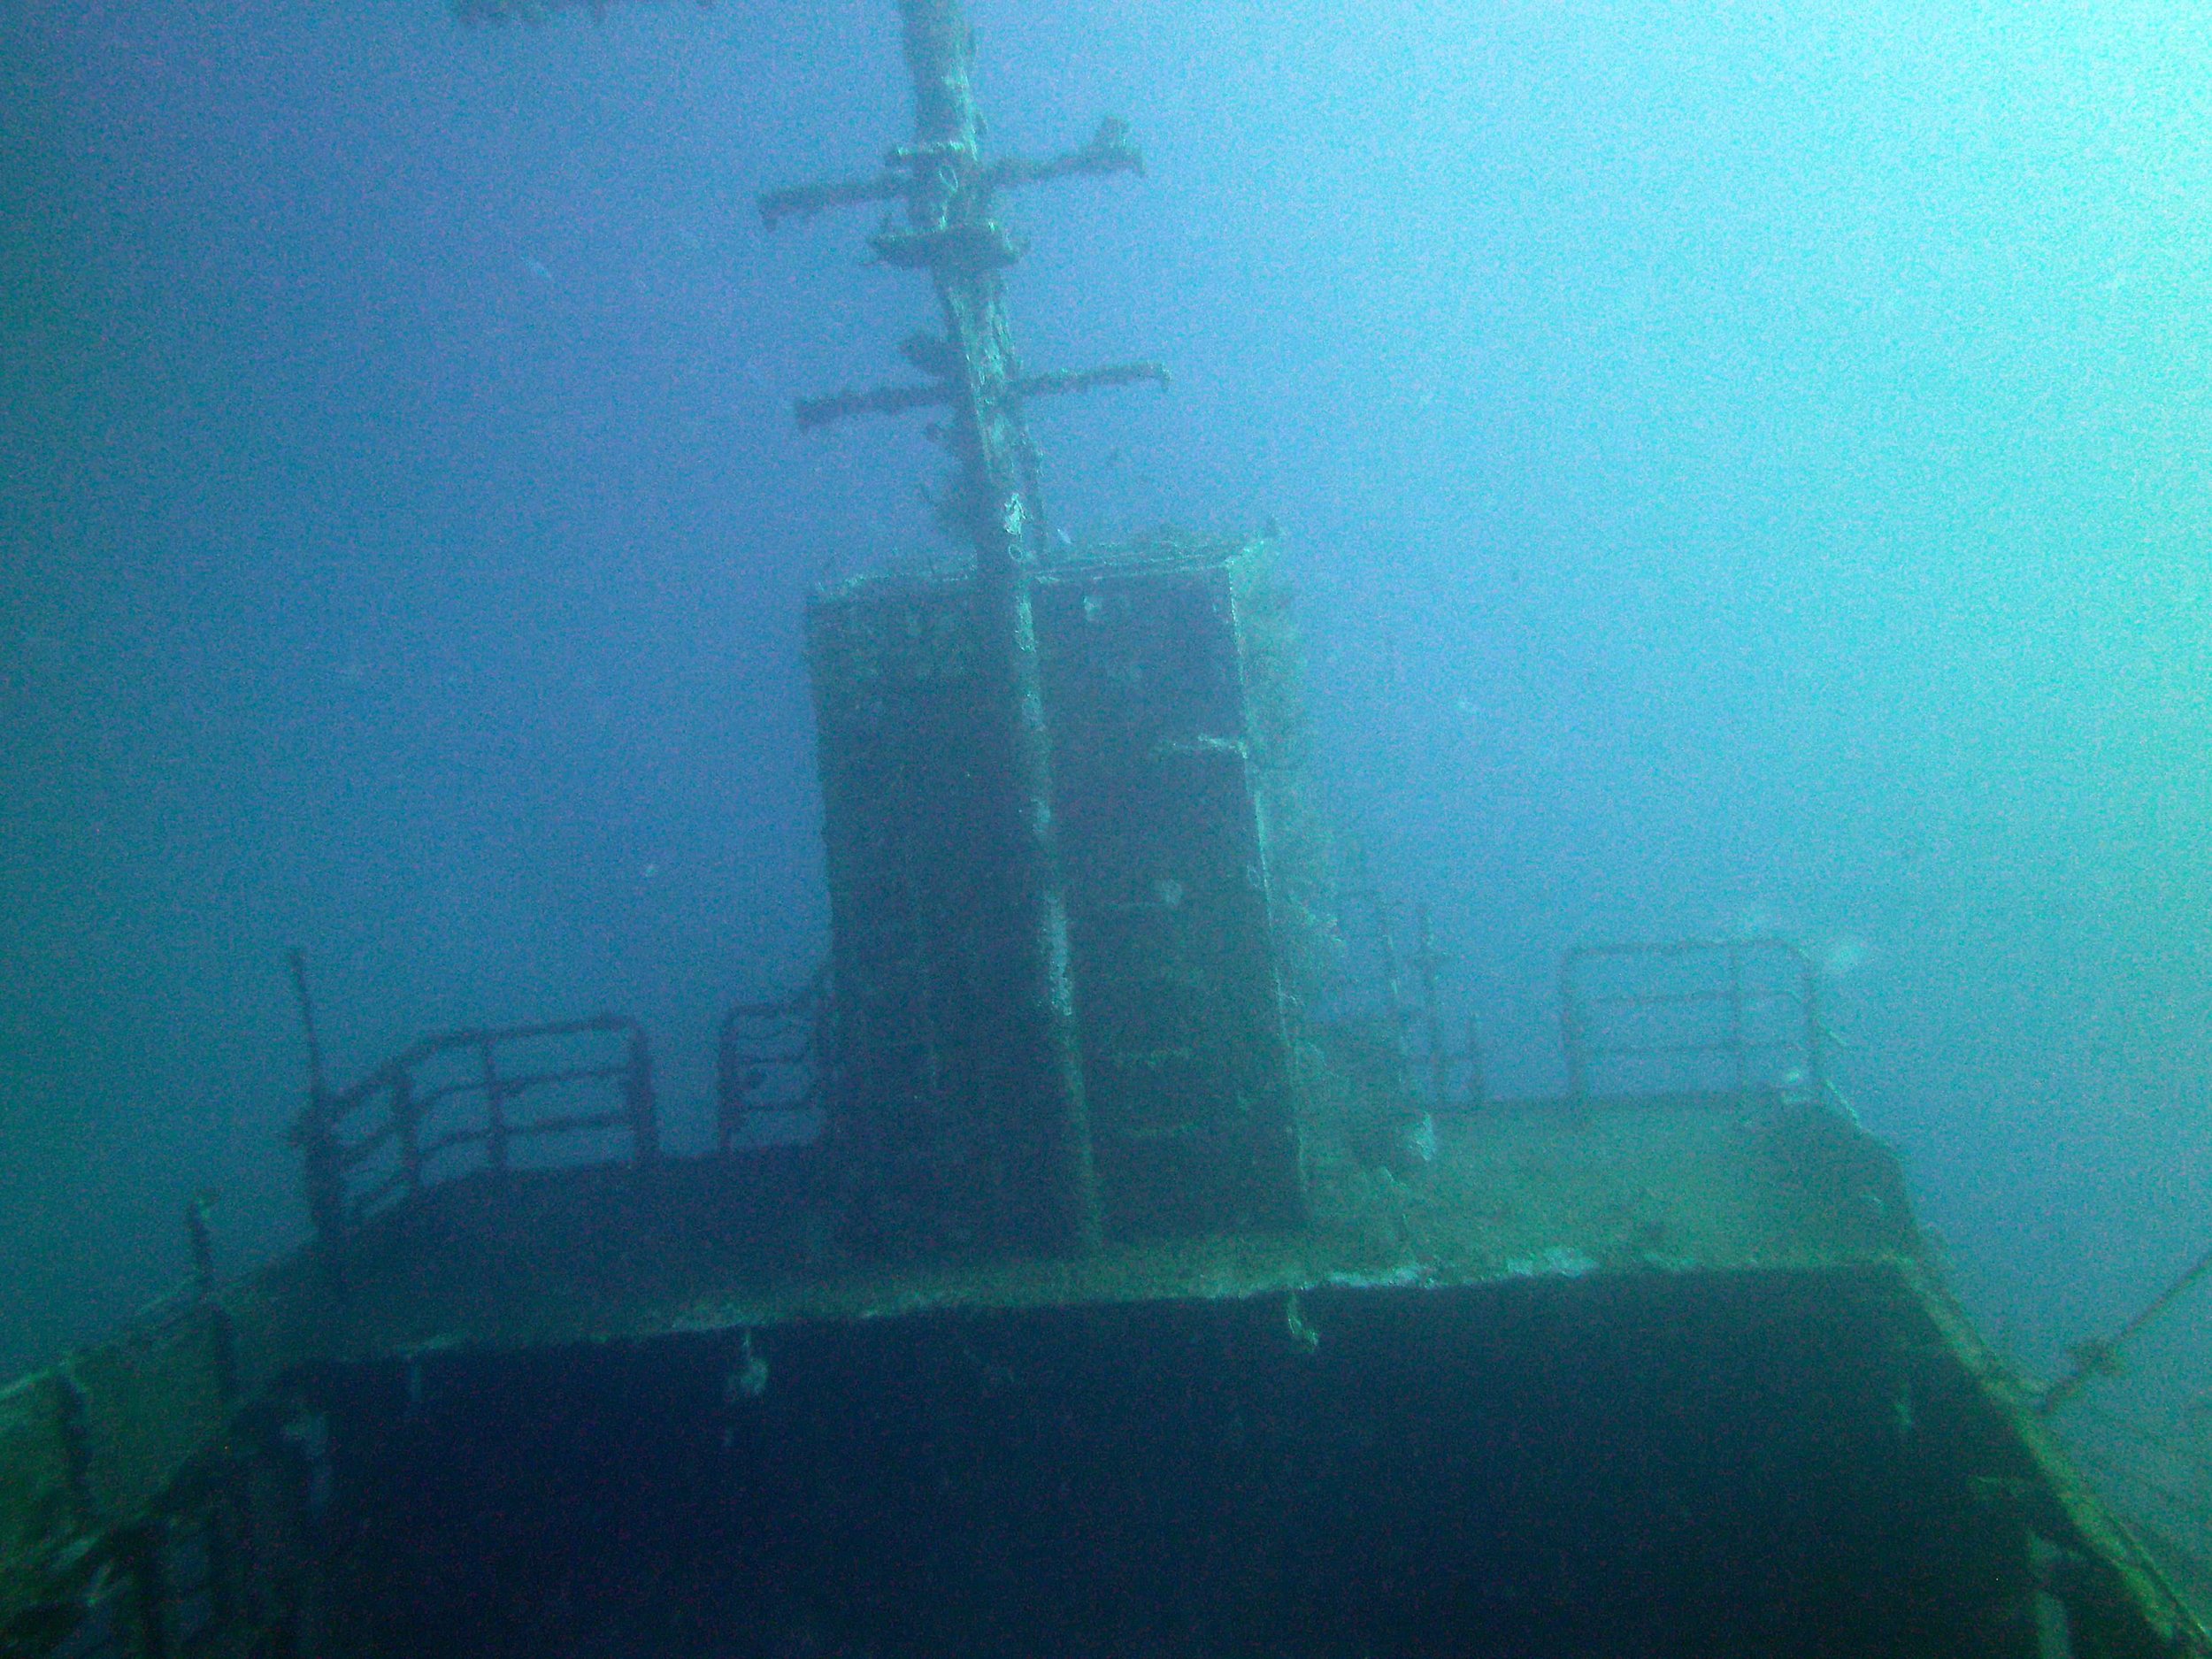
For example, according to the NOAA (National Oceanographic and Atmospheric Association) no-decompression dive tables, a diver using Nitrox 36 (or NOAA Nitrox II) may stay up to 50 minutes at 90ft/27m of sea water, while a diver using air may only stay a maximum of 30 minutes at this depth.
2. The Point
This is a top requested dive site from divers and a staff favorite, too! Less than a 10 minute boat ride from West End, this site encompasses the southern point of the island. It is famous for its giant barrel sponges, sea fans, and its nutrient rich water that brings in tons of fish ready to feed. Due to the topography of this site, we like diving it on Nitrox because it allows us to explore the wall, as well as the large plateau area (the area of this site that The Point is famous for) with an average depth of 50ft/15m.
Weather conditions for this site can vary daily, so we like to check the conditions to ensure the wind and potential currents are appropriate to still make it a fun and enjoyable dive!
3. The Seamounts of Cayos Cochinos
The seamounts of Cayos Cochinos lie 18 miles off the point of Roatan and can be reached by special two-tank charter trip (weather permitting), and simply phenomenal when the conditions are right. None of the seamounts break the surface, and the diveable mounts peak between 70ft/21m and 40ft/12m in depth. To get the most bottom time out of each dive, we strongly encourage Nitrox for at least the first dive. The coral at the seamounts is healthy and vibrant, and you have the opportunity to see lots of different schools of fish hanging off the reef as they feed.
Now, just because we recommend Nitrox for these dive sites does not mean you can't dive them on air. We simply think that these sites in particular are more enjoyable when you can spend longer enjoying the deeper topography of these sites!
Not a certified Nitrox diver yet? No worries, it's a fun, easy and enormously beneficial course! The PADI Enriched Air Diver certification can be done in a few hours, so it won't have to take up your entire vacation. Check with your local dive shop or drop us a line, and we would be happy to get you diving on EANx32!
Am I Ready To Do My PADI Advanced Open Water Course?
For many Open Water Divers, the Advanced Open Water course can seem like an elusive or possibly intimidating certification. Do I have what it takes to be an advanced diver, and why should I even take a course like this?
Fear not, diving friends! Let's shed some light on what it takes to complete your PADI Advanced Open Water course.
For many Open Water Divers, the Advanced Open Water course can seem like an elusive or possibly intimidating certification. Do I have what it takes to be an advanced diver, and why should I even take a course like this?
Fear not, diving friends! Let's shed some light on what it takes to complete your PADI Advanced Open Water course. Enthusiasm is not required, but it's a huge plus!

The Advanced course takes a minimum of two days and consists of five PADI Adventure dives.
PADI offers many types of Adventure Dives to choose from. Underwater Navigation and Deep Dive are required, giving you three more Adventure Dives that you can choose. Here at Roatan Divers, the most popular Adventure Dives we teach are the Night Dive, Drift Dive, Underwater Naturalist, and Peak Performance Buoyancy.
Classroom time: For the Advanced course, you complete the Knowledge Reviews for the Adventure Dives you have chosen, then after a thorough briefing from your PADI Instructor, you go on an open water dive to apply what you have learned. Unlike the PADI Open Water Diver course, there are no confined water skills.
Why should I become a PADI Advanced Open Water Diver?

We love getting this question! One of the most common motivators for divers to pursue this certification is their desire to go on more elaborate, adventurous dives! Perhaps a deep dive to the El Aguila ship wreck that sits at 30m/100 feet? Maybe a night dive to catch the magical bioluminescence, or better buoyancy to give you control and confidence to avoid unwanted contact with the reef when looking at smaller marine life.
The very popular Deep and Night Dives can be a bit more complex, so they require additional knowledge and safety aspects to consider. This course allows you to expand your skills and confidence to make you a more well rounded scuba diver.
One of the biggest struggles for new divers is gaining better control their positioning and buoyancy on a dive. The Peak Performance Buoyancy dive is a great opportunity to experiment and challenge yourself in this area. It can even help improve your air consumption along the way!
Common misconceptions
Let's clear up a few of the myths that might be stopping you from starting your PADI Advanced Open Water course.

There is no minimum number of dives required if you're already a PADI Open Water or Junior Open Water Diver.
As a PADI Open Water Diver you are certified to a depth of 18m/60ft, so if you'd like to go deeper, additional training is strongly encouraged.
Open Water divers over 15 years old can participate in ALL of the Adventure Dives that are available in the PADI Advanced Open Water course. After completing the course, they will be certified to dive to a depth of up to 30m/100ft.
Junior Open Water divers over the age of 12 can participate in many of the Adventure Dives as well. After completing the Advanced course they will be certified up to 21m/70ft, which will automatically upgrade to 30m/100ft when they turn 15.
Now that you have a better understanding of what the PADI Advanced Open Water course consists of now, you can talk to your local dive shop if this is the right course for you!
If you're interested in speaking to us or have any additional questions, please contact us today!
Let's Try Scuba Diving!
You love the ocean and enjoy snorkeling. Sometimes, though, you wish you could get a little closer to the reef and all the fish, and you could do with a less less salt water in your snorkel. You've heard that it takes a few days to get your scuba certification, and you're just not sure you're ready to take such a big step. What options do you have?
You love the ocean and enjoy snorkeling. Sometimes, though, you wish you could get a little closer to the reef and all the fish, and you could do with a less less salt water in your snorkel. You've heard that it takes a few days to get your scuba certification, and you're just not sure you're ready to take such a big step. What options do you have?
Have no fear, the PADI Discover Scuba Diving program is here! In the same way that you can take a car out for a test drive before you buy it, you can try out scuba diving before pursuing your certification course. The PADI Discover Scuba Diving program is a half day course that introduces you to the underwater world while also teaching you about equipment and basic underwater safety skills. You get to experience a real dive, like certified divers do, all under the supervision of a PADI instructor to ensure your safety and comfort.

At Roatan Divers, our typical PADI DSD program looks like this:
1. Your instructor explains the essentials of what you need to know about scuba diving, your equipment and some basic scuba skills. You'll also watch a short PADI DSD video to help you visualize your underwater experience.
2. Now it's time to start blowing bubbles! You'll enter shallow water with your instructor for some underwater skills practice. We normally do this in beautiful Half Moon Bay, located right next to the dive center, where you can get comfortable with your scuba diving gear and practice what it will be like diving in open water.
3. You've built up some confidence, and now you're off to do a dive to maximum 12m/40ft in the Caribbean Sea. Your instructor will evaluate the weather and water conditions and select a dive site that's just right for your experience. We have over 30 dive sites within a 10 minute boat ride from the dive shop, so there are a ton of possibilities!

When you embark on your PADI Discover Scuba Diving experience, you will always have your experienced PADI instructor with you to help things go smoothly, and to allow you to have the best experience possible as you dive and explore the healthy, vibrant Mesoamerican reef.
If you enjoyed your PADI Discover Scuba Diving experience and want to dive some more, then let us know and we can arrange additional DSD dives with your instructor! And if you're hooked on diving and are ready to further your skills and education, then the PADI Open Water Diver course is for you. Please contact us if you have any questions or are ready to get started on your scuba diving adventure, and let us help you plan the experience of a lifetime!
How To Prevent Ear Infections
How much of a bummer is it to get an ear infection partway through your scuba diving holiday? A big bummer, that's how much.
How much of a bummer is it to get an ear infection partway through your scuba diving holiday? A big bummer, that's how much. The best treatment for an outer ear infection (a skin rash) is to stay out of the water, and the treatment for an inner ear infection is antibiotics and staying out of the water, and neither of these bode well for a hard earned holiday under the sea.
However, there's hope: like with most other things, prevention is easier than treatment. If your ears are especially sensitive, letting seawater, which contains bacteria, just sit in your ear all day creates an ideal environmental for more bacteria and fungus to grow, so you need to make sure to clean your ears out after each dive. There are ear drops on the market that you can purchase, or it's easy to make your own as well.
The best homemade ear treatment is a 50/50 mix of rubbing alcohol and white vinegar. Pour some of the mix into your ear, let it sit for a minute while you massage it around, then pour it out. The rubbing alcohol dries your ear out, while the vinegar balances the pH so that it's harder for bad bacteria and fungus to grow. You'll smell like a salad, but your ears will be fresh and clean.
If you don't have rubbing alcohol and vinegar on hand, you can also at least rinse your ears out with warm water. If you don't have access to a hot shower, mix hot and cold drinking water and pour it into your ear. The most important thing is to get rid of the salt water.
And no matter what anyone says, please don't pour hydrogen peroxide in you ear. The bubbles might feel cool, but you may be doing irreversible damage to your ear.
So there you go, it's super easy to prevent ear infections! We hope you have a wonderful holiday filled with lots of diving, and with none of that painful ear nonsense.
Happy diving!
4 Great Reasons to Do Your PADI Deep Adventure Dive
As an autonomous, certified diver, you can go to whatever depths you want, and many dive centers around the world will take you past your certification limits, but there are multiple reasons why you should do your PADI Deep Adventure dive before going deeper than 18 meters/60 feet.
Congratulations, you're a certified diver! As a PADI Open Water Diver, you are certified to plan and execute a dive on your own with a buddy to maximum 18 meters/60 feet. You are well on your way to an exciting underwater adventure and a profound relationship with the planet's waters.

While you will be planning and executing dives just with a dive buddy or under the indirect supervision of a dive professional in many places, especially in Europe and North America, there are also a lot of places around the world that you will be guided by a professional on all your dives. The dive centers will set your gear up, take it apart, brief you, and guide you. It's very easy to get complacent after your course when you don't have to lift a finger or plan your dives anymore.
At Roatan Divers, we're all about 60 minute dives, so we normally set our dives to maximum 18 meters/60 feet, unless a specific dive site warrants a deeper depth, for better air consumption and longer no-decompression limits. We're also very strict about sticking to the depth limits of each divers' certification levels, so we pick our sites based on certification and experience levels.
When we have divers that are Open Water certified and want to go to El Aguila wreck (or other deep sites), we always do the dive as a PADI Deep Adventure dive, for our divers' safety and future opportunities.
What is the PADI Deep Adventure dive?
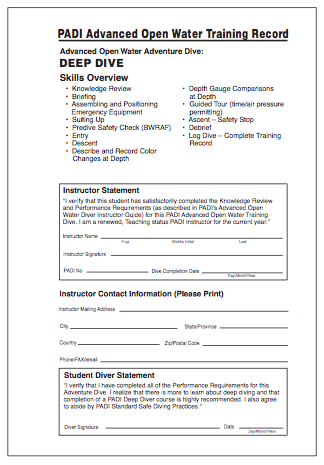
The PADI Deep Adventure dive is one of the required dives of your PADI Advanced Open Water Diver course, and is the dive that certifies you to maximum 30 meters/100 feet. As an autonomous, certified diver, you can go to whatever depths you want, and many dive centers around the world will take you past your certification limits, but there are multiple reasons why you should do your PADI Deep Adventure dive before going deeper than 18 meters/60 feet:
1. Extra training is always good
There are additional risks to consider when diving deeper, so it's always a good idea to get the proper training. In the theory for the PADI Deep Adventure dive, you learn more about no-decompression limits, decompression sickness, nitrogen narcosis, and about the protocols for deeper diving, all of which will benefit your diving and your safety in the future.
2. You have greater opportunities for your future diving
A lot of dive centers divide groups up based on their certification and experience levels. If you are an Open Water Diver with 50 dives but don't have the training to go deeper, then you may be put in a group of less experienced divers and taken to easier dive sites. If you have the training to go to 30 meters/100 feet, then that will certainly open up your diving opportunities.
3. It counts as credit for future courses
The PADI Deep Adventure dive counts as credit towards your PADI Advanced Open Water Diver course, as well as your PADI Deep Diver specialty course. So on top of the extra training that you get and the opportunities it opens up, you also have the opportunity to get more certifications in the future! It's a win all around.
4. Insurance purposes
While good diving insurance will cover you with regards to diving accidents, there is a very high chance they won't cover you if you exceed the limits of your training, so if you are a PADI Open Water Diver and get into an accident at 30 meters/100 feet and haven't completed the PADI Deep Adventure dive, then your insurance may not cover you because you made the choice to exceed your own limits. It's a bit of a bummer of a reason to do the Deep dive, but an important reason to consider.
As a scuba diver, you should never stop learning. Never stop your pursuit of continuing education, never stop practicing. Scuba diving is a fun experience that brings groups of people together, but it's also a sport, so it's important to keep your skills updated. There is always more you can learn to become a better scuba diver.
Happy diving!
5 Ways to Find the Right Fins for You
It's important to have good fins, both for diving comfort and safety, so let's discuss how to pick the right fins for you!
Last time, we discussed the importance of finding a good mask for you. Fins are a pretty important of your scuba diving set-up, too. They are the reason you can move about easily underwater, and without them, you would certainly be much less graceful underwater and on the surface! It's important to have good fins, both for diving comfort and safety, so let's discuss how to pick the right fins for you!

Tip 1. Full foot vs open heel
Ah, the great debate. Full foot fin versus open heel fin - which is better? Well, that really depends on your preferences. We're going to weigh the pros and cons of each fin type, but remember, in the end it all comes down to preference.
Full foot fins tend to be light and flexible, so they're great for travel and don't put much strain on your legs when you kick. Each fin manufacturer has different foot pocket shapes and sizes, so it's easy to find a pair that will fit your foot shape. The downside is that since they're flexible, they don't have the same propulsion as an open heel fin, and it's safer to shore dive with boots on. Until your feet get used to them, full foot fins can also cause rubbing on your feet, but it's pretty easy to deal with it by wearing socks (while neoprene socks are ideal, you can also use gym socks). Full foot fins tend to be more affordable than open heel fins, so if you're just wearing them a few times a year and diving in mostly tropical places, they're perfect.
Open heel fins are great in colder waters because you need to wear boots with them and ideal for shore diving or diving in more difficult climates with strong currents. They're versatile, because you can have one pair of fins and then multiple boots to match each environment (3mm booties for warmer waters, 5mm boots for colder), and tend to be more durable than full foot fins. The downside is that they're not as easy to travel with because they are bulkier, they are generally more expensive than full foot fins and you have to have boots. The nice thing is that their sizing is more broad, so they are incredibly versatile in that sense.
Tip 2. The newest fins on the market are not always the best
Some fins are classics for a reason. The fins that we consider to be the best on the market are the Mares Avanti series. You'll notice a lot of instructors use the Mares Avanti open heel fins, and that's because they are good, strong, and never break. The Avanti series has been around for years and years, and their style hasn't changed (for good reason). Personally, I feel like the more bits and bobbles the fins have, like high-tech hinges, the quicker they are to break. Talk to your experienced diver friends and dive professionals to see what they recommend.
For us, when it came to rental fins, it was always going to be the Mares Avanti full foot fins, regardless of what other brand we were going to use for the rental equipment. The Avantis, whether they're full foot or open heel, are the ideal fins for long term use and rental because they are just.so.durable. We've had our Avanti full foot fins in commission as rental for over two years now, and not single foot pocket has ripped. The fins still look and feel new, and that's saying a lot considering the amount of use they give us.
Tip 3. The perfect fit may not be perfect for you
For some of you, having fins that fit perfectly before your dive are exactly what you need. For others, including myself, fins that fit too perfectly at the beginning will only cause problems as your dive progresses. Your feet might swell a bit when you dive, same as any other form of exercise, and those fins that fit oh-so-perfectly at the start of the dive might start cutting off your circulation 40 minutes in. For those of you whose feet swell, you should aim for fins that are a little loose, but not so loose that your heel pops out when you lift your heel. If you're between sizes, get a pair of socks and size up. Your feet will thank you.
Tip 4. Take your environment into consideration
You need to take your environment into consideration when getting fins. Think past the point of just full foot fins and open heel fins and start thinking about whether you're diving tropical water, cold water, caves, technical, currents or leisure. If you know that you are planning on doing mostly tropical, easy diving, then you don't need to get heavy duty cave diving fins. In the same way, if you plan on doing mostly technical and wreck diving, you shouldn't get long free diving fins because they aren't the best suited for your needs.
Tip 5. Take your travel style into consideration
If you're a light traveler, a backpacker or are a leisure diver, then getting heavy, cumbersome fins are probably not the best option for you. If you're a hard core diver that's going specifically on a dive trip, you're planning on stay in one place for your an extended period of time and you have the appropriate bag for it, then your fin options are greater. Figure out what kind of trips you'll be going on most and plan your fins accordingly.
And there you have it, our Top Five Tips for finding the right fins for you!
5 Ways to Pick the Right Mask for You
So you're about to go off on a grand dive adventure. To make sure you can see crystal clear on every dive, you want get to get your own mask before you go! What should you look for when you buy a scuba mask?
So you're about to go off on a grand dive adventure. To make sure you can see crystal clear on every dive, you want get to get your own mask before you go! What should you look for when you buy a scuba mask?

So many masks, so little time!
Tip 1. Price is not top priority
There are millions of masks out there to fit millions of faces. Some brands are better than others, of course, but don't assume that just because it carries the highest price tag, that it's the best mask for you. My first scuba mask was a $100 thing that leaked so I had to basically cement it to my face. I later discovered a $25 mask that fit my face like a glove, so I've been using that one for six years now.
Tip 2. How you test fit is important
When you're testing a mask at the store, don't put the strap on. The best way to test for fit is to hold the mask up to your face without putting the strap on, suck in and see how it seals to your face. If it makes a suction-y noise when you pull it off, that's the ideal fit.
Of course, things might change when you're underwater and under pressure, but the on-land fit test is a pretty accurate one. Ideally, you'll find a rental mask that you just love when you're on vacation, and then you know exactly which one to buy when you get home!
Tip 3. Don't wear the mask too tight
If a mask fits you properly, it should actually stick to your face when you're under pressure without having the strap on. The strap is essentially there so that the mask doesn't come off on land, and so that you can clip it to your BCD, but your mask shouldn't fall off your face if your strap happens to break underwater.
Unfortunately, too many people wear their masks way too tight, and that can alter the grooves in your face, which can cause leaking. So you wear your mask tight so that it doesn't leak, and then it has the opposite effect. No bueno.
Tip 4. De-fog your mask the right way
When manufacturers make masks, they line the inside of the mask with silicone to preserve the masks in transit. If you don't get rid of it, your new mask will fog up every time you dive, even if you put the most expensive de-fog in the world in it.
Use toothpaste to get rid of the silicone inside the mask. You don't want a gel toothpaste because there are no abrasives in it, you basically want whatever cheap toothpaste you can find. Put it in the mask and rub it around for a while. We've discovered that using ScotchBrite to rub the toothpaste around speeds the process up significantly, but make sure the gentle kind so that you don't scratch the mask.
You'll often hear people recommending burning the mask with a lighter, but unless someone is really, really experienced and really, really careful with it, I would strongly advise against it. If you burn too much, you'll ruin the temper of the glass and it's not as strong as it's supposed to be.
Tip 5. Store your mask properly
Rinse your mask after every dive. After every dive or snorkel trip, you should wash the mask with dishwashing soap, let it dry, then store it in a cool, dry area. Sunlight and heat age the silicone skirt of the mask really quickly, so you want to avoid that. If you treat your mask well, you'll get years and years out of it, so it's just good investment practices to keep it well-maintained.
And those are our Top Five Tips for buying a scuba mask! We'll have more posts coming up about other pieces of scuba equipment as well, so stay tuned!
5 Surefire Ways to be a Scuba Beauty
Let's face it, scuba diving is not the most glamorous sport. I don't know who decided that sexy was the way to go in all those scuba equipment ads in the magazines, but it is a big fat lie. Mask marks, snot on your face and a saggy wetsuit is what defines a true diver.
Let's face it, scuba diving is not the most glamorous sport. I don't know who decided that sexy was the way to go in all those scuba equipment ads in the magazines, but it is a big fat lie. Mask marks, snot on your face and a saggy wetsuit is what defines a true diver.
There are, however, some ways that we can come out of our dives not looking like the Tasmanian Devil. So ladies, I give you Five Surefire Ways to be a Scuba Beauty!
Tip 1. Keep your hair back with a headband or hoods
There's nothing worse than getting your hair snagged in your mask strap or having it floating all around your face. Headbands are cheap and something you can find anywhere. Preferably go for a thick headband so that it doesn't slide around as much, or there are some headbands specifically designed for swimming and scuba diving that are made from more durable materials, like silicone.
For hairstyles, braids seems to be the best option to avoid your hair from going all over the place. You can do a french braid and not need a headband at all, or use a headband and braid your hair normally.
Another option is to wear a hood. That way, all your hair is contained and you don't have to worry at all! If you're worried about feeling constricted, opt for a thin "beginner" hood instead of a neoprene one.
Tip 2. Soak your hair in fresh water before your dive
Our hair is porous, and that's one of the reasons that salt water wreaks such havoc on your hair, because the salt water soaks in completely. If you soak or rinse your hair in fresh water before you go diving, your hair will be maxed out on what it can absorb, so the salt water won't be able to soak into your hair. It won't prevent of salt water damage completely, but it will certainly limit the damage!
Tip 3. Rinse your hair with fresh water right after you dive
You don't even have to use conditioner, just make sure to rinse your hair with fresh water after you dive. If there are no showers or hoses available after your dive, then you can even use your water bottle as an impromptu shower as well. Rinsing the salt water off as soon as possible will help prevent damage.
On the plus side, salt water in your hair means that your hair will start to bleach, so if you're going for a lighter look, this is certainly an au naturel way to do it!
Tip 4. Waterproof is your friend
I wouldn't advise wearing make-up when you dive because it's all just going to come off, but if you have to wear make-up, please go for waterproof options. Your eyes may look lovely and lined before the dive, but you're just going to end up looking like a panda afterwards.
In general, I would advise against foundation, concealer, blush and lipstick, even if they're waterproof. The foundation will just end up all over your mask, so you'll have a weird, make-up-less circle around your eyes where it's come off, and you'll have more lipstick on your mouthpiece than on your lips.
Tip 5. Don't worry, be happy!
We're all going to have bad hair or skin days, even when we're not diving. We're going to have nights that we didn't get enough sleep, or our noses are runny. It happens.
The best thing about diving is that we're all in the same boat (figuratively speaking). When we're diving, all of us, no matter what, are going to come up with snot all over our faces and salt water in our mouths. Don't worry about how you look, just focus on how you feel and how awesome that dive was and how accomplished you feel. That's the key to making you a true Scuba Beauty!